

People archive and compress files for different reasons. It might be to make it easier to transport the files and folders electronically or to organize backups of large files. Or to save significant storage space on your Mac.
Regardless of your reason for archiving or compressing files, two of the most popular formats are RAR and ZIP.
RAR was introduced by Eugene Roshal in 1993, and although the format is available to everyone, it is not open source and comes with its share of limitations. To open and create RAR formats, you need third-party software. But the format offers much better compression.
On the other hand, ZIP is one of the original archive formats created in 1989 by Phil Katz. All major operating systems support it, and it is open source. The format also supports password-based encryption and light compression.
So, in theory, ZIP is a better option to archive and compress the files and folders on your Mac. However, if you are looking for a format offering much better compression, RAR might be the better choice. But since RAR is only sometimes compatible with operating systems and platforms, the question arises of how to convert RAR to ZIP on Mac. For RAR files, you need third-party software. You can use a lightweight, intuitive Mac app called Archiver to quickly convert RAR files to ZIP. The app converts one archival format to another without unzipping the files first.
Now that’s settled, this article deals with how you can create ZIP files on your Mac. Since there’s no need for third-party software for opening and creating ZIP files, this archival and compression format is the winner.

Step-by-Step Guide to Creating Zip Files on Your Mac
- In Finder, go to the spot containing the folders or files you want to zip.
- Choose the files or folders you want to use by pressing Control + A. Select all the items in the folder, hold Shift, and click the first and last folder or file. Or you can connect them individually by holding Command on the keyboard.
- Once the items are selected, right-click or hold the Control key and click. Then, choose Compress.
The items will be zipped into a single file within the same folder. It will be named Archive by default, and you can change the name later by right-clicking and choosing Rename.
See also: Top 10 Rar, Zip, Unzip Apps for Android | Free Download
How to Decompress Zipped Files on a Mac?
On your Mac, there’s nothing to do except double-click on the zipped files you want to decompress. The Archive Utility will unzip the files for you. You don’t need any third-party software. Also, you don’t need to open Archive Utility. Simply double-clicking the files is enough.
The files will be unzipped in the same spot. Click the folder, and you will find all the extracted files.
What is Archive Utility on Mac?
The Archive Utility does all the zipping and unzipping on a Mac. Hence, you may want to know what Archive Utility is.
It is a small application in-built into the Mac operating system. The app is used to perform compression or archiving and expansion of files in the background. The app does the job without opening the window of the utility itself.
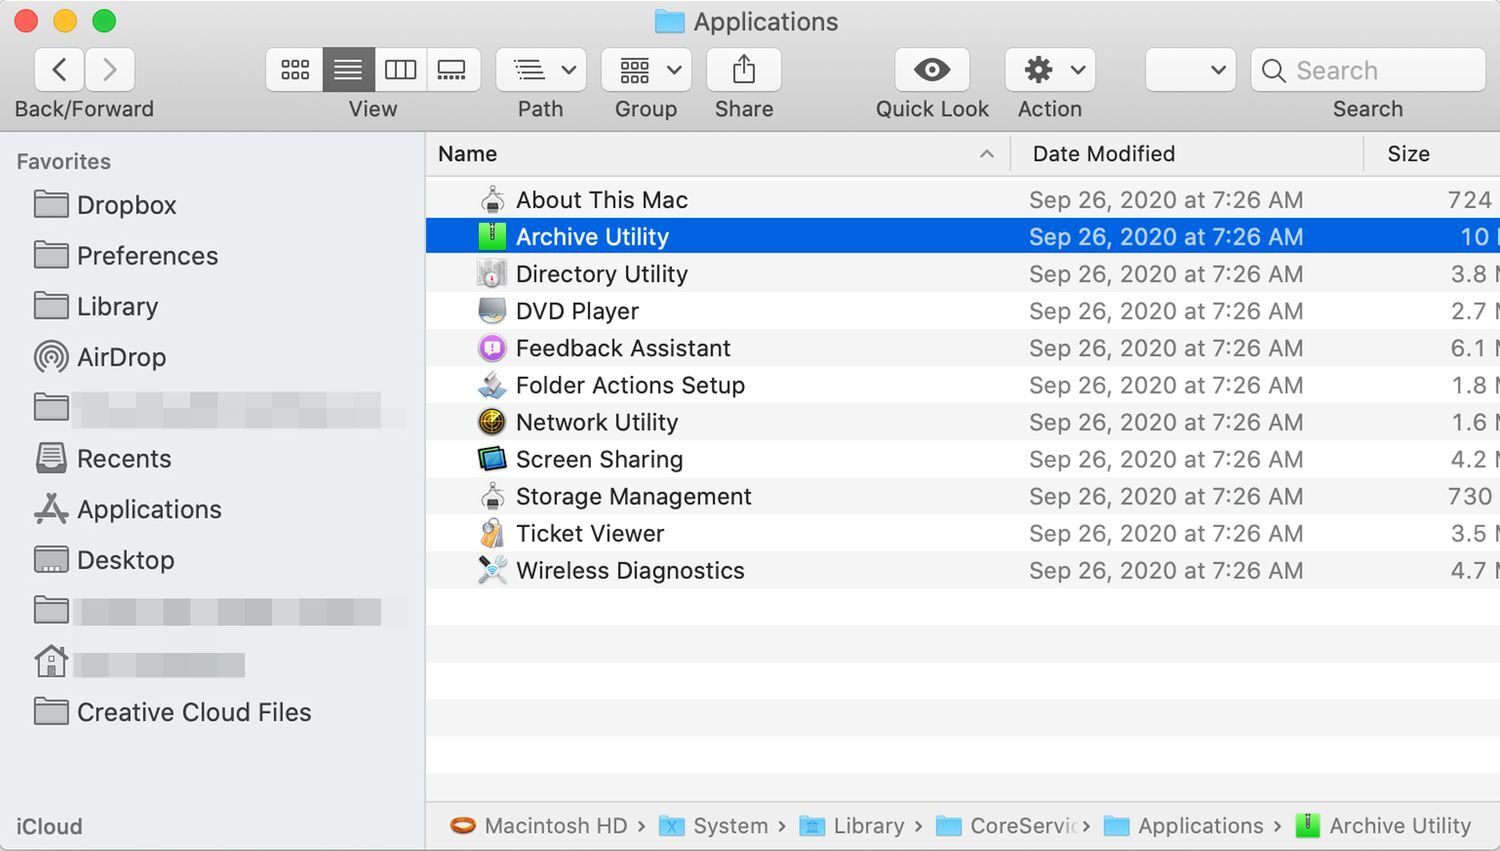
Unlike other Mac applications, this application is hidden in a system folder. You can access Archive Utility by going to /System/Library/CoreServices/Applications or/System/Library/CoreServices in pre-Yosemite versions. While here, you may also find other utilities used occasionally, like Screen Sharing, Network Utility, etc.
See also: MacDroid Review: An All-in-One Android File Transfer for MacOS
To find Archive Utility quickly, open Finder and go to the search bar. Then, type Archive Utility. Or you can use Spotlight search.
As mentioned, the Archive Utility is tucked away in the system folder because you don’t have to open the app to use it. But you can make some changes to the app’s preferences.
Open Archive Utility and then click Settings or Preferences from the top menu. In the window that appears, you can change the compressed files you receive or those you compress yourself. For instance, the final location where the files are saved can be adjusted to Downloads, Desktop, or any other folder using the Save archive and save expanded files settings. After the files are unzipped and zipped with the After Archiving and After Expanding drop-downs, you can decide what action must be taken.
Once you have made the changes, close the preferences window.
Check this out: How to Switch Files from Old Phone to New iPhone 11/iPhone 11 Pro
FAQs
Is there a zip program for Mac?
Yes, the default app for zip files on Mac is Archive Utility.
What is the size limit for zip files on Mac?
The size of the Zip files uploaded should be lower than 4GB.
Are zip files encrypted?
The files which are being zipped are encrypted.
Conclusion
There you have it! You never have to think twice before zipping and unzipping files on your Mac. The in-built tools are capable enough to do the job. But to convert them, you must use third-party software supporting multiple formats.
See also: How to Edit a File Inside a Docker Container?

You can always find me playing the piano or playing FIFA when I’m not binge-watching TV Series with pizzas. Fountainhead of TechWhoop.
Life motto: The only time success comes before work is in the dictionary.